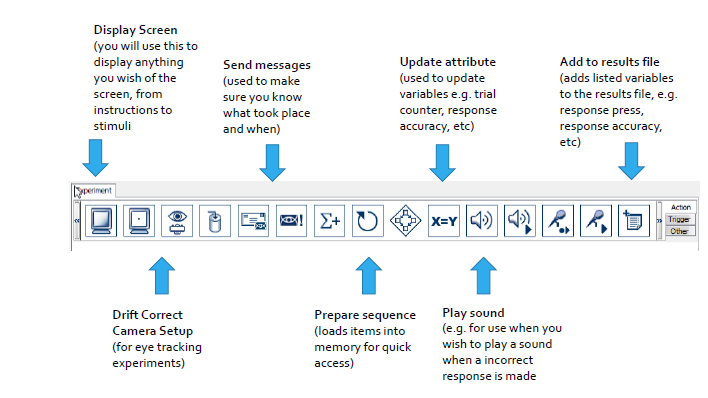
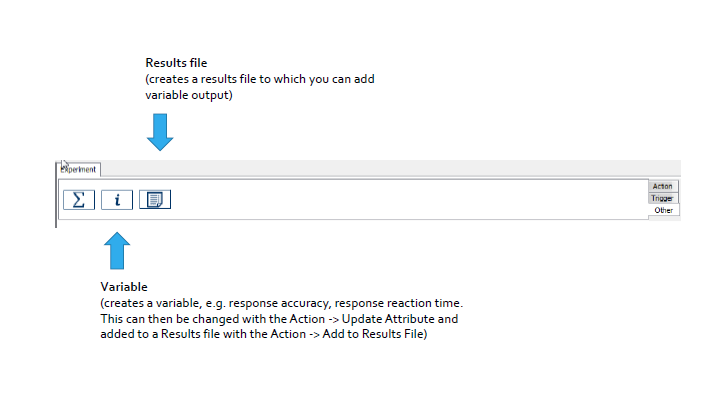
There are numerous sections of options within Experiment Builder. Here is a breakdown of all the different settings and option locations that you will use and where/what they are. We will highlight how they all work by setting up a basic experiment.
First, create a new experiment. To do this, go File>New, as below.
Now, create a new experiment using the window that pops up.
- Enter a Project Name – This is the folder name for your experiment
- Specify a folder location
- For now, make sure EyeLink Experiment is unchecked as we are, for the time being, not going to be using the eye-tracker. This is shown below.
Once your experiment has been created, you will be presented with a blank workspace, as below. You can now begin making your experiment! Let’s begin by giving an outline of what all of the buttons in front of you are.
Orientation: The Experiment Builder Interface
Here is an overview of the buttons on the toolbar and what they do:
Here is an overview of the different panels, panes and buttons you get:
The Experiment Toolbar contains most of the things that you will need to create your experiment, see the diagram below.
The Experiment Toolbar consists of three tabs:
- Action – to display stimuli, play sounds and update attributes
- Trigger – for responses, mouse, keyboard, timer and button box responses
- Other – specialised functions for creating variables, results files and other miscellaneous tasks
We will now go through each of these in turn to introduce to where everything is.
Help!
It’s always important to point out where the help documentation is.
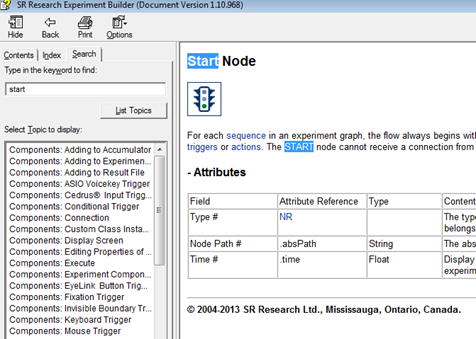
- This course won’t tell you everything, so to get help, go Help>Contents (left image below)
- This is the Experiment Builder Manual (right image below)
- It is very useful and lists what every menu item/preference/property used in Experiment Builder
- If you are not sure what something is have a look in the manual
- There is a search bar to easily find what you are looking for
Preferences: Introduction
One of the most important things you need to do is set up basic information for your study. This includes the monitor resolution, type of eye-tracker being used, and so on.
To view/modify the preferences, go Edit>Preferences. You will then be presented with a window like below. Here, you can uncheck EyeLink Experiment if you are not creating an eye-tracking experiment.
Preferences: Refresh Rate
One of the most important aspects of the Preferences is the ability to set the right refresh rate for our monitor. Getting the right refresh rate is really important for the timing of stimulus presentation. You want the refresh rate to be as high as possible when using lab machines (100Hz), but when testing on a normal flat screen, keep this set to 60Hz.
Basically, remember to change this 60 highlighted below to 100 before running your study for real!
Preferences: Button Box
You also need to tell Experiment Builder what type of button box you will be using (if any). You can select this from the Prefernces>Experiment>Devices>BUTTONBOX menu in Preferences. The default here is the USB Sidewinder gamepad, as below:
In our labs, we have the newer type of response box, which requires a few settings to be changed, see below:


