Next, we need to tell Experiment Builder when the answer is correct or incorrect. Notice in our datasource we already have a column called “expected_button” which lets us know which button press is correct for each trial. We can use this information to create what is called a “Conditional Statement”. Conditionals are common in programming, but they follow the logic of:
- IF response is correct do something
- IF response is incorrect do something else
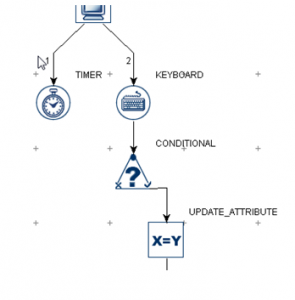
In our case, the conditional will appear after the KEYBOARD response but before UPDATE_ATTRIBUTE. We want to play the error sound only when the response is incorrect.
Conditionals and Feedback
To do this, let’s begin by creating a new variable to record accuracy. We do this in the same way we created RT and BUTTON_PRESS earlier:
- Create a new variable called RESPONSE_ACCURACY
- Set the default value as any number that you won’t use i.e. we will use 0 and 1 for correct and incorrect, so I set the default as 999
This process is shown below.

We now need to insert some new actions and triggers. Follow these steps:
- Delete the link between KEYBOARD and UPDATE_ATTRIBUTE
- Drag a CONDITIONAL Trigger from the Trigger bar
- Notice it is shaped like a triangle and the button two points have a cross and a tick
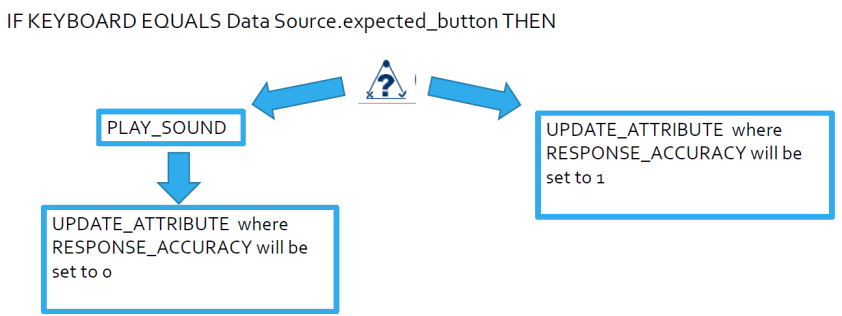
- We will give the triangle a conditional statement : this is sketched out below.

IF
KEYBOARD.TriggeredData.key
EQUALS
Data Source.expected_button THEN [DO SOME ACTIONS]. The start of this is shown below.

Next, we need to set up the RESPONSE_ACCURACY in UPDATE_ATTRIBUTE. Here are the steps to follow, with an animation below:
- Click on UPDATE_ATTRIBUTE and in the Properties panel click on Attribute-Value List
- Set the Attribute as the RESPONSE_ACCURACY variable. Remember the Attribute is what you want to change
- Set the Value to 1. Remember the Value is what you want the Attribute to be changed to. Typically, a value of 0 is used for incorrect and 1 is used for correct, but you can use whatever values you like.


