Let’s calculate how long the participant took to respond on a trial!
To do this, we begin by inserting a VARIABLE from the Other toolbar. Rename this VARIABLE to RT. Give it a default Value of 0 (zero). This will be the starting value of the RT variable, as shown below.

Next we need to be able to change the value of the RT variable to be equal to the actual reaction time during that trial. To do this, drag the UPDATE_ATTRIBUTE action from the Action toolbar and link it to the KEYBOARD trigger in your workspace.
This means that the RT variable will get updated after a keyboard button has been pressed – see below.

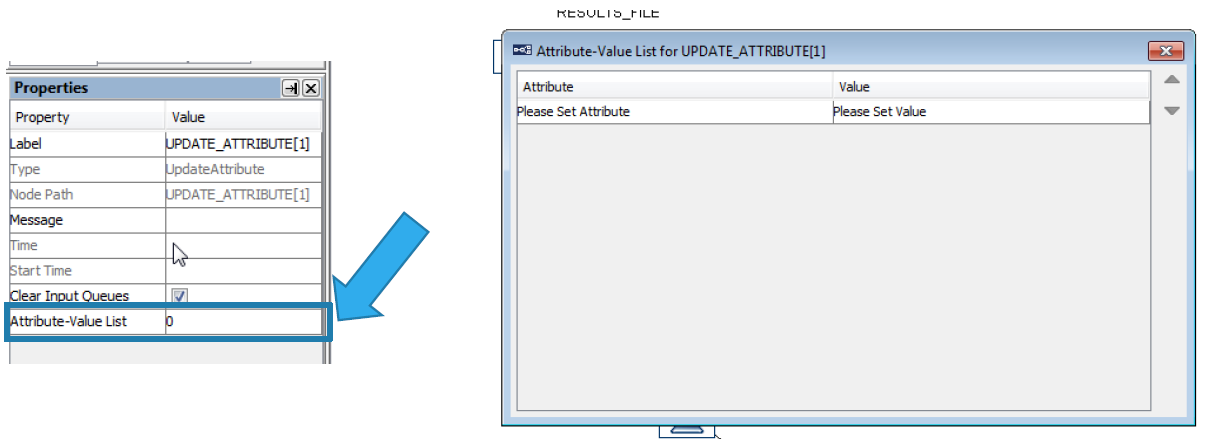
Click on the UPDATE_ATTRIBUTE you have just created and look to the left at the Properties panel. This is where things can get a bit tricky for people with no programming experience, but we will go through what to do next step by step.
In the Properties panel, click on Attribute-Value List and you will be presented with a popup window with two columns:
- Attribute – which is the variable you want to update
- Value – which is the what the variable will be changed to each time
This is shown in the screenshot below.
Now, how do we actually change RT to be the time that the button was pressed? We begin by choosing the Attribute (or value) we want to change. As shown below, click the three dots in the “Please set Attribute” box. This will bring up a layout of the whole experiment in the Node Selection panel. From here, you can point to any value, timer, display, stimulus or button press value in the entire experiment. For now, all you need to do is select the RT variable under Node Selection. Then the word Value will appear under the Node Attributes panel. Double-click Value here and then press OK. This is all shown below.

Finally, we need to tell Experiment Builder what value to update our RT attribute to. Experiment Builder doesn’t “know” the RT for a trial automatically; instead, we need to calculate it. To do this, we need to calculate the RT by subtracting the time the button press occurred from the time that the display was shown. Fortunately, though this might sound complicated, it’s not that hard since all of this information is available to us via the Node Selection and Node Attributes panels, as shown below.
The formula is: KEYBOARD.TriggeredData.Time – DISPLAY_SCREEN.Time

That’s it! We now have the experiment calculating the RT after the keyboard is pressed. But what we are lacking is the ability to output this value. To do so, we need to use a RESULTS_FILE – something that we move to next.
